It wouldn’t be a Silent Hill game without some seriously tricky puzzles, and Silent Hill f is no different. Take note that this article is based on the game’s Hard difficulty puzzles. It should still be applicable to Story difficulty puzzles, with a couple of tweaks here and there, and I’ll include the Story mode hints and answers where I can. Without further ado, here’s our complete puzzles guide for Silent Hill f.
Altar Puzzle
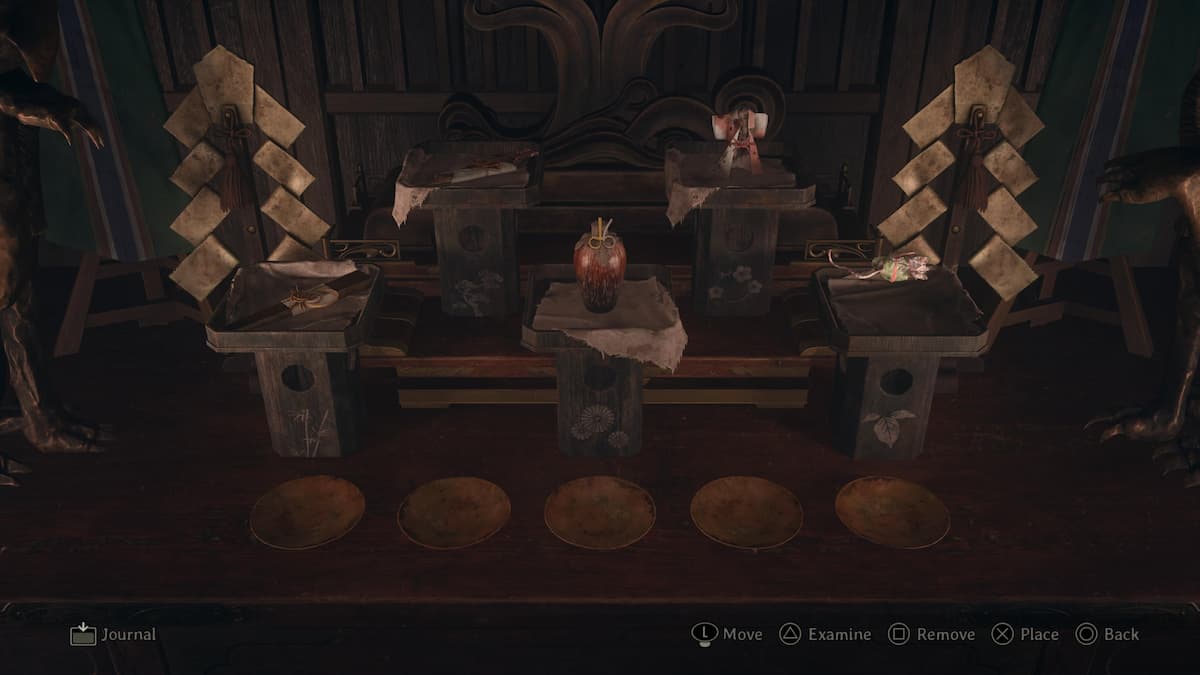
The very first puzzle in Silent Hill f requires you to place five items on the correct pedestals. The clue is as follows: “The restless heart betrays thee as unfit for this auspicious day. Thou must first pay respect to the gods and the spirits of thine ancestors. A restless heart leads to a corrupt soul. Only through sufficient offerings laid upon many stands may thy soul be cleansed.”
Honestly, the clue is pretty useless because everything you need is in the items themselves. Pick up each item and examine them, and you’ll see that each one features a motif that corresponds to a drawing on the pedestal.
The solution is as follows: Fan, fish, urn, kimono, rat.
For the Story mode version, examine the way the strings are tied on each item. Every string features a slightly different loop or pattern, so just match them to the patterns on the pedestal.
Shrine Vault Puzzle
For the very first puzzle in the shrine area in Silent Hill f, you’ll need to pick up two clues. One can be obtained by interacting with the doll on the east side of the map, while the second clue is obtained by interacting with the large rock on the west side.
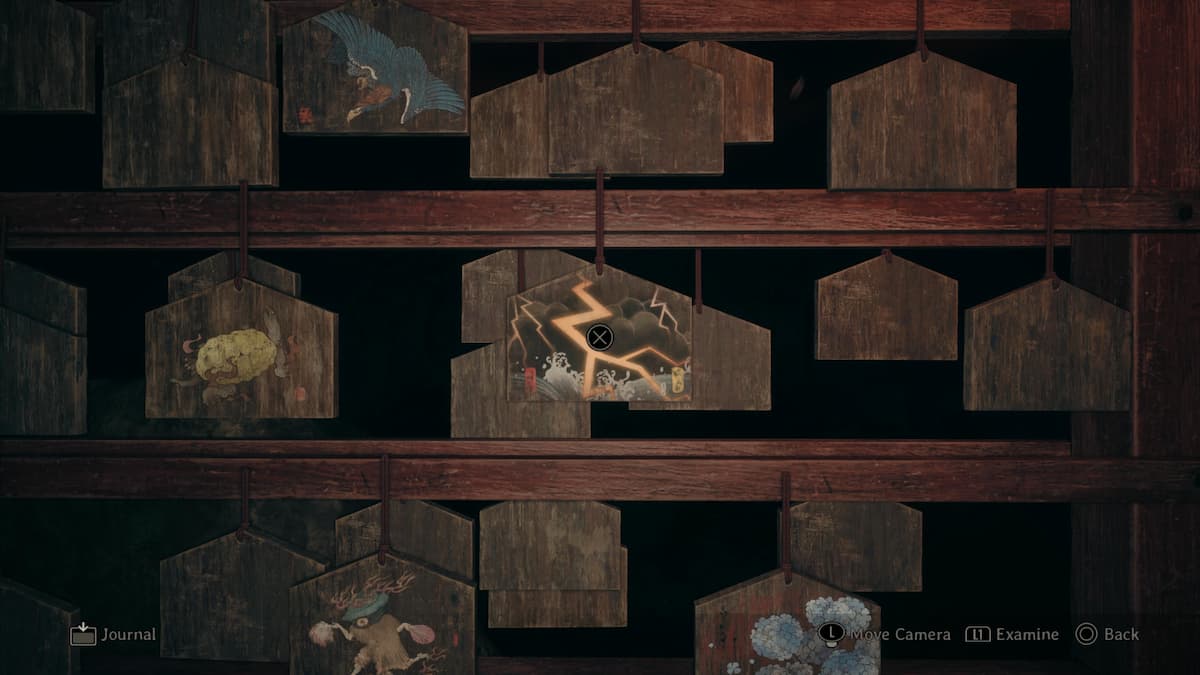
The first clue reads: “Lightning cast down from the heavens split asunder the decayed tree.”
On the eastern side of the map, check all of the emas to find an image of lightning striking from the sky. Flip it over to find the solution. Hinako will automatically record it in her journal.
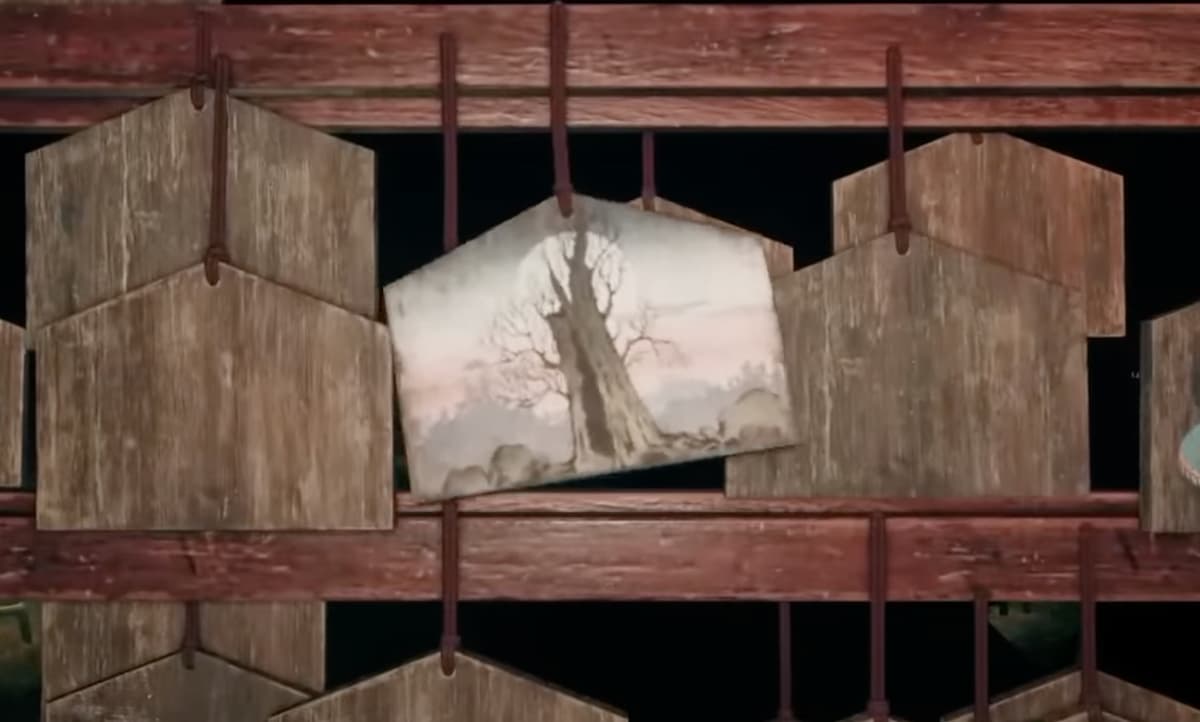
The second clue reads: “From the earth grows a kudzu, the prophet of eternal prosperity.”
Both emas can be found on the western side of the map. First, you’ll want to look for the ema that shows a barren tree, as indicated below:
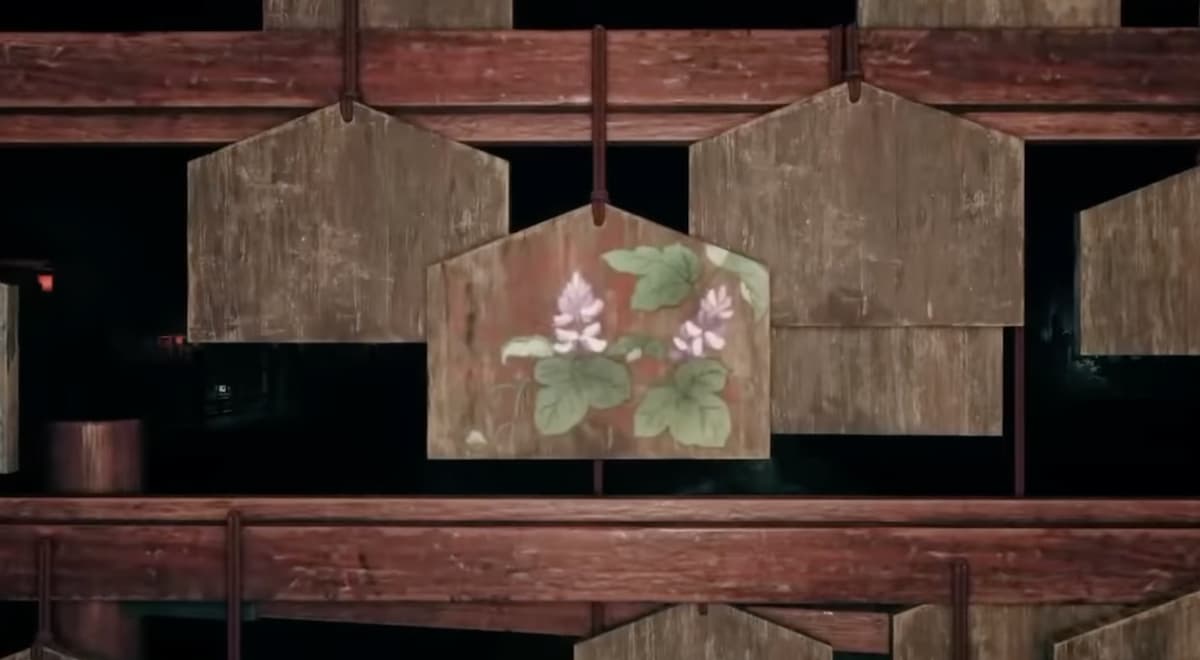
Finally, for the third ema, look for the image of a light pink plant sprouting from green leaves, as shown below:
Before you leave the area, don’t forget to flip over the ema with an image of a cat to find a bonus omamori. Back at the main gate, interact with it to have Hinako fix the lock, allowing you to input the three symbols to unlock it. The solution is shown below:
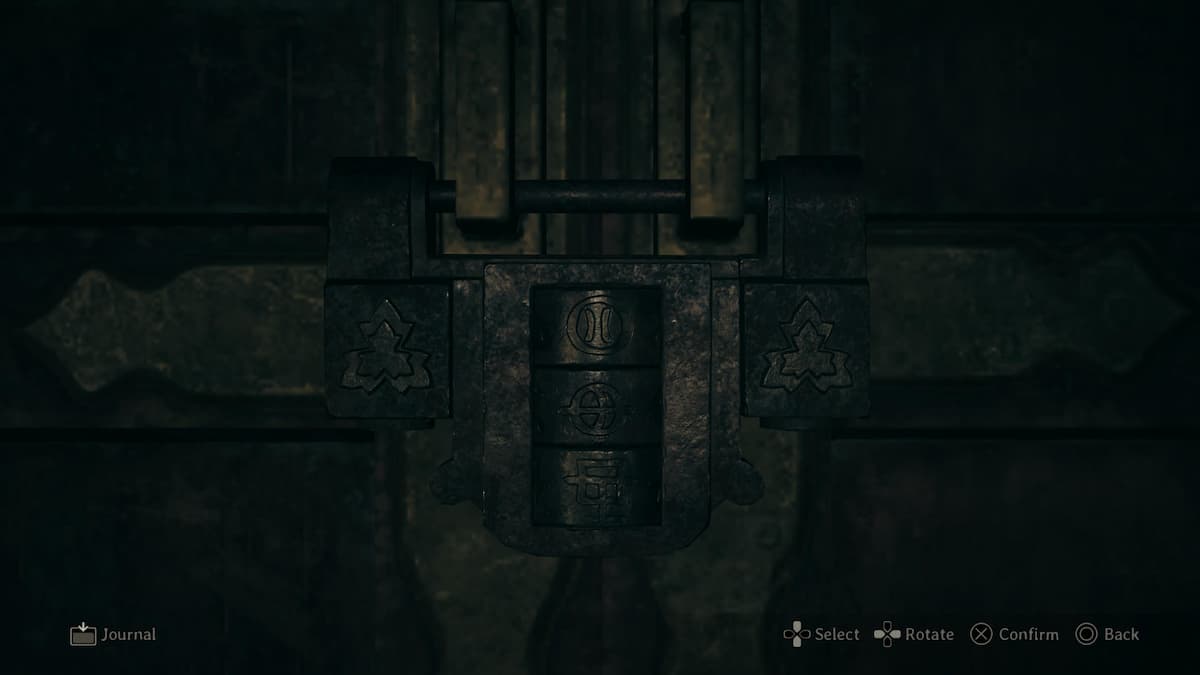
- Top answer: The symbol that looks like two vertical lines in a circle.
- Middle answer: The symbol that looks like a plus sign in a circle.
- Bottom answer: The symbol that looks like a square with a horizontal line cutting through it, and an L shape protruding down below.
For the Story mode version, the clues require you to look for emas with a serpent, crane, and tortoise on them.
Field Scarecrow Puzzle
This is, in my view, one of the coolest puzzles Silent Hill f has to offer. There are multiple stages to this puzzle, and completing them all will allow you to escape the fields. Get it wrong, however, and you’ll get lost in the fog and be forced to recheck the last section. To make things more complicated, enemies will also show up occasionally and keep you on your toes.
Scarecrow Puzzle #1
For the very first puzzle, read the Mysterious Note next to the doll. The Note tells you that one scarecrow out of the bunch is actually benevolent, and all you have to do is examine it, pull out the thorn, and it’ll show you which way to go. In terms of gameplay mechanics, what this means is that you should examine a scarecrow, move the left stick around to examine it and look for a small white thrown sticking in its body, hold L1 to zoom in, then press X to pull it out. If you picked the right scarecrow, it’ll transform and point you in the right direction. If you’re wrong, it’ll attack you.
Without further ado, here’s the first clue: “Can you even imagine how I feel? I’ll put on my polite smile for now.”
For this puzzle, look for the scarecrow with a sword in her hand and a smile on her face, but also look for the mask hanging on the back of her head where the mouth is twisted down to look sad. Examine the scarecrow and pull the thorn out of her shoulder. Her body will twist and she’ll literally point you in the right direction.
Start running towards the direction the scarecrow pointed in, and you’ll eventually reach a new area with more scarecrows.
Scarecrow Puzzle #2
This is where things start to get a little bit tricky. The second clue reads as follows: “Can you even imagine how I feel? What it’s like to have been deceived by you for so long?”
The keyword here is “deceived”. This implies that the writer felt betrayed, or maybe even backstabbed? Look for the scarecrow with a sword in her back and pull out the thorn. She’ll then transform and point you in the right direction.
Scarecrow Puzzle #3
The third clue reads as follows: “Can you even imagine how I feel? He never once looked at me the way he looked at you. Not once.”
For this puzzle, you’re looking for the female scarecrow looking at a boy scarecrow, who’s looking at another female scarecrow. The correct one is the scarecrow with her arms slightly stretched to her sides and her back arched so sharply her head is basically almost upside-down. Examine her to get her to transform.
Scarecrow Puzzle #4
The fourth clue reads as follows: “Can you even imagine how I feel? You’ve always been such an eyesore.”
For this puzzle, look for the female scarecrow with no weapons in her hands. Her arms are twisted and stretched out with her right knee up, and she’s looking to her right. Examine her to get her to transform.
Scarecrow Puzzle #5
The fifth clue reads as follows: “Can you even imagine how I feel? You hurt me, and even hurt him, too. Do you know how it feels to force a smile when I’m staring at that disgusting face of yours?”
For this puzzle, look for the female scarecrow with the blade in her back, and her face looking directly down at the ground. Examine her to get her to transform. There’s no need to run any further after this, as this marks the end of the scarecrow puzzle in Silent Hill f.
Wooden Box Puzzle
This next puzzle in Silent Hill f is located on the second floor of the middle school. You’ll need to open the secret wooden box on Rinko’s desk, and there are three parts to it. Each part comes with a different clue, and you’ll need to use the clue to figure out which images to expose on the box.
Wooden Box Section #1
For this first section, the big clue is as follows: “The sweet and tart fruit on the cake… The taste still lingers in my mouth like it was yesterday. Do you still remember the taste, too?”
Don’t overthink this one like I did. Just expose all of the images with sweet and tart fruits on them, so: grape, strawberry, pineapple, apple, cherry, and orange.
Wooden Box Section #2
For the second section, the important clue from the letter is as follows: “By filling up one journal after another with our thoughts, I know we can make a fresh start. A blank page upon which we can write the new story of our lives.”
You’re looking for the images with notebooks, journals, and pages. Pick the following: the two closed notebooks, and the two notebooks open with pages flipping.
Wooden Box Section #3
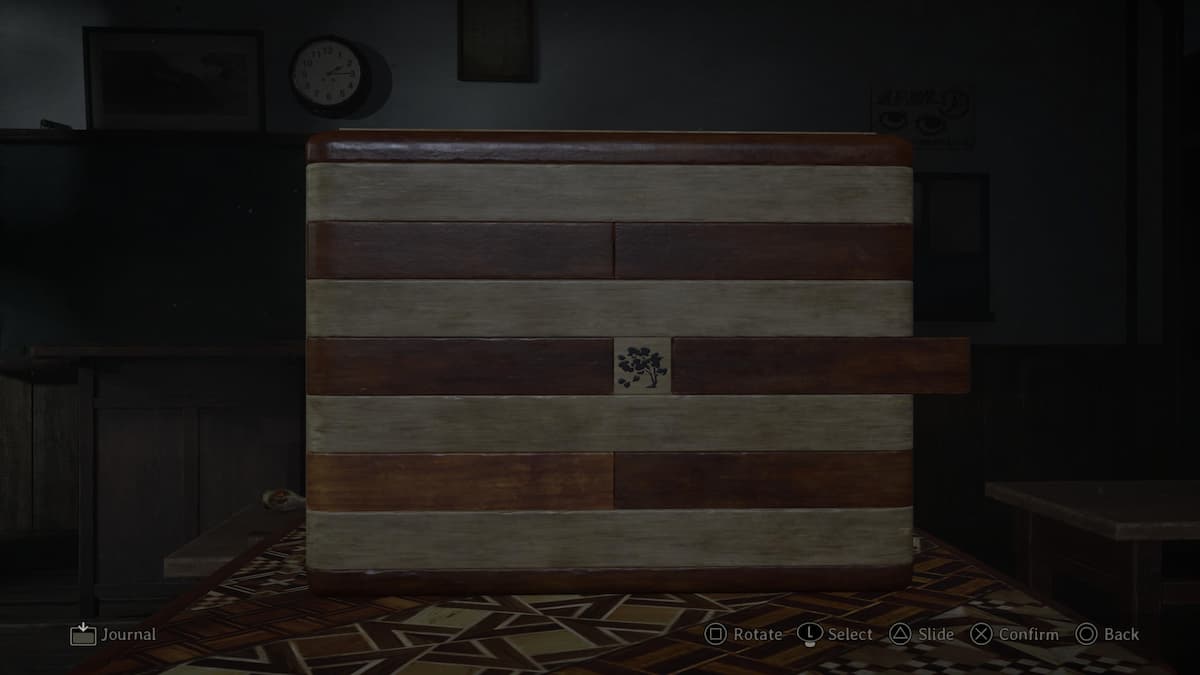
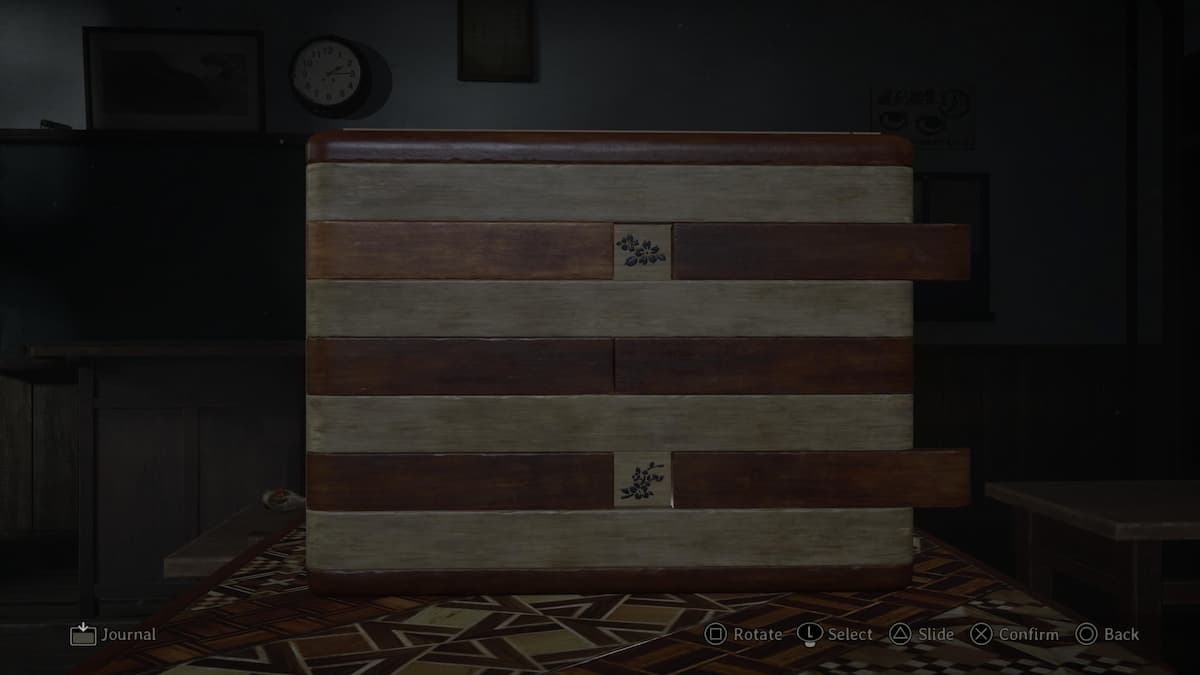
For the third and final section, the clue is as follows: “And then, surely spring will arrive, welcoming us with sakura in full bloom to celebrate our union. Can you picture the beautifully blooming sakura awaiting us?”
This one can be a little tricky if you’re not familiar with what sakura looks like, but basically, there are only three images you need to expose, and they’re all of beautiful flowers on a stem, as shown in the screenshots down below:
All Middle School Locker Combinations
After getting the key to explore the rest of the second floor, you’ll find various notes and clues for the locker combinations. I’ve listed all the solutions below:
| Locker | Combination |
|---|---|
| Aoi | 401 |
| Suga | 505 |
| Ayami | 479 |
| Asakura | 865 (Hard mode), 534 (Story mode) |
| TT | 377 |
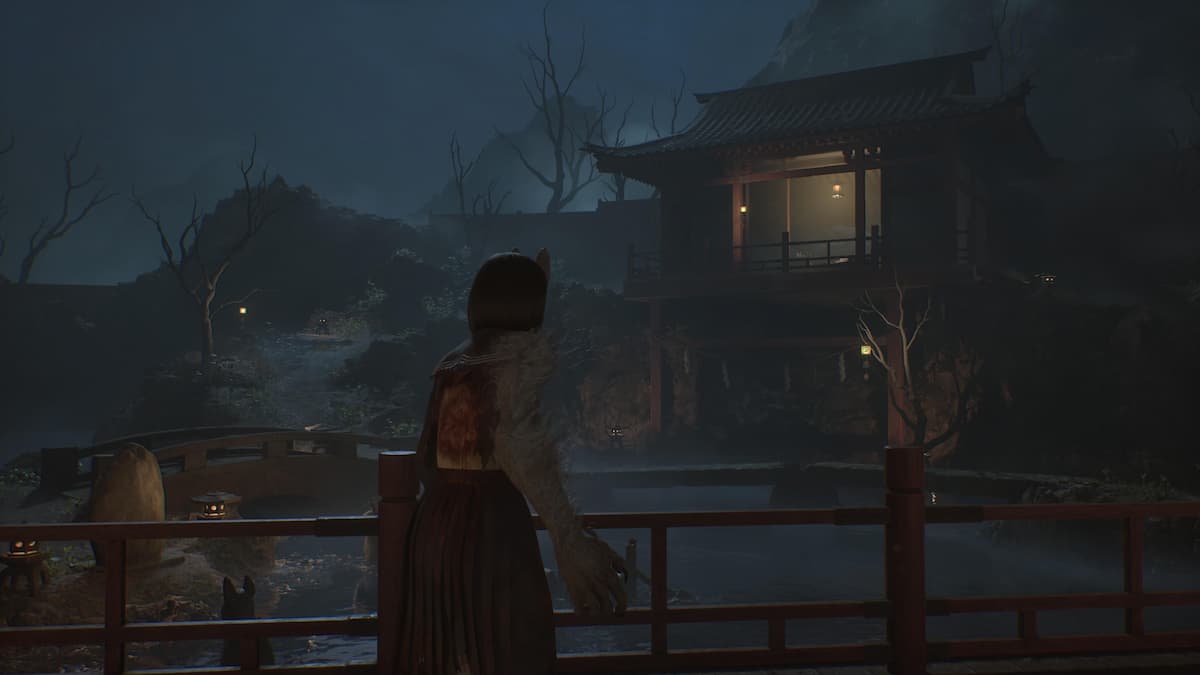
Dark Shrine Lantern Puzzle
When you visit the Dark Shrine again in Silent Hill f, you’ll need to go down two pathways to complete a ritual before the main middle door opens. Down one path, you’ll explore the past and psyche of Sakuko. At the end of this little area is a lantern puzzle where you must rotate two fox and two rabbit statues in order to get all of the cages in the room perfectly aligned with one another.
Facing the cages, from left to right, I’ll number the statues as Fox 1, Rabbit 1, Fox 2, and Rabbit 2. This means that Fox 1 and Rabbit 1 will be on your left while Fox 2 and Rabbit 2 will be on your right as you’re facing the cages.
Here’s the solution:
| Statue | Direction |
|---|---|
| Fox 1 | Left |
| Rabbit 1 | Right |
| Fox 2 | Left |
| Rabbit 2 | Right |
Shimizu Residence
The warped version of the Shimizu residence is probably the biggest map Silent Hill f has to offer, and it’s also home to quite a few puzzles. I’ll go over each one slowly down below.
The map for Shimizu Residence might look intimidating at first, but once you figure out how it works, it’s actually not too bad. This area has three maps, and you access each one by going through the northern door at the end of the main hallway. In order to go through this door, however, you need to have a calendar placed on the hallway wall leading to that door. There two calendars to find, and you can get them naturally just by exploring the map.
When you feel you’ve exhausted everything you can do in one map, head through the door to get to the next one. Do note that you cannot go back the way you came; you can only go forward. This means that you’ll always have to cycle through Residences 1, 2, and 3 in order.
Weighing Scales Puzzle
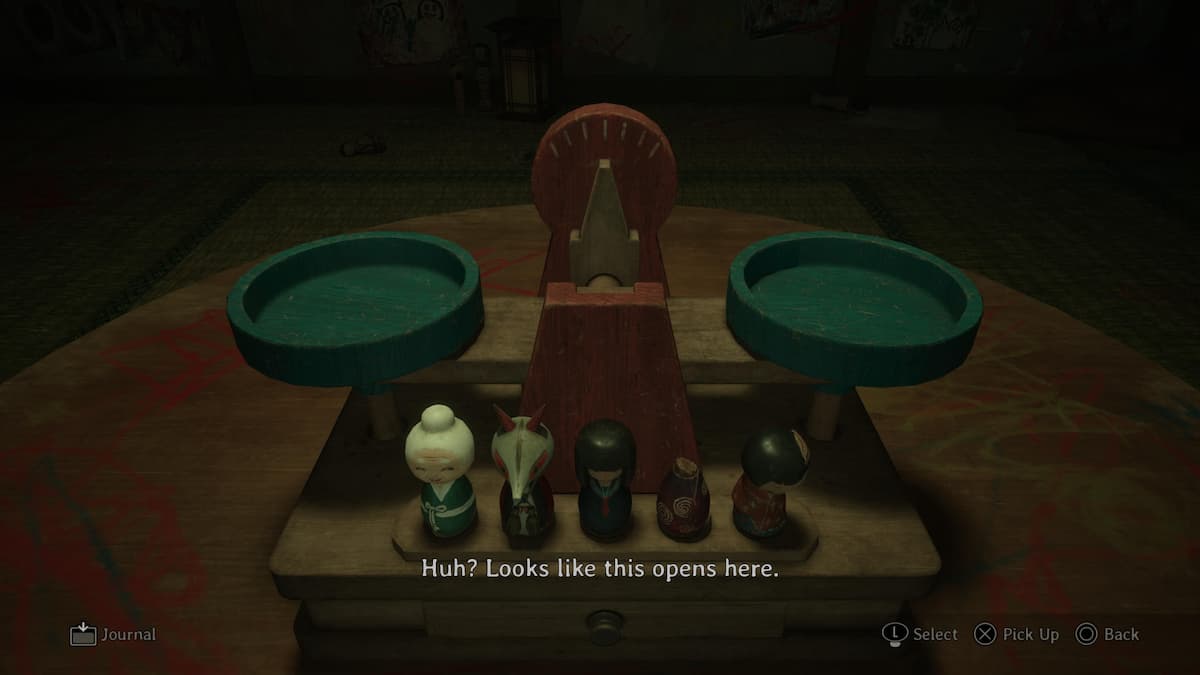
The clue for this puzzle reads as follows: “I’m always alone, so I’m OK with playing by myself. That means I have the right dish and the left dish aaall to myself. I like to play with kokeshi dolls a lot. I’m extra careful to share them with left Hinako and right Hinako so it’s fair to both of them!”
Now look at the scales on the table. Your goal is to split up the kokeshi dolls between the two scales so that they’re perfectly balanced. The solution is very simple, and I’ve listed it below:
| Left Scale | Right Scale |
|---|---|
| Grandfather, Mother, Girl, Fox | Small bag |
Once you place them correctly, a monster will immediately spawn in to attack you. Grab the crest from the table and leave.
If you’re going for Ending 2, the solution is as follows:
| Left Scale | Right Scale |
|---|---|
| Girl, Grandmother, Fox | Mother, Small bag |
Kitchen, Propane Tube, Block of Wax, and the Bird Door
This part of the puzzle requires you to go through all three maps in the Shimizu Residence. You’ll find the kitchen in Shimizu Residence 1, and you’ll get the Propane Tube and Block of Wax in Shimizu Residence 3. While exploring Hinako’s room in Residence 3, look at her bookshelf and use the left stick to move downwards to look at the bottom of the shelf. Press L1 to zoom in, then press X to take the book. Hinako will open the book to reveal a Block of Wax.
With the Propane Tube and Block of Wax in hand, head back to Residence 1 and go to the kitchen. Attach the Propane Tube, then interact with the pot to melt the Block of Wax to reveal a key with a bird insignia on it.
Now, head all the way back to Residence 3 and open up the door with the bird insignia to get one of the three crests.
Room With the Photos Puzzle
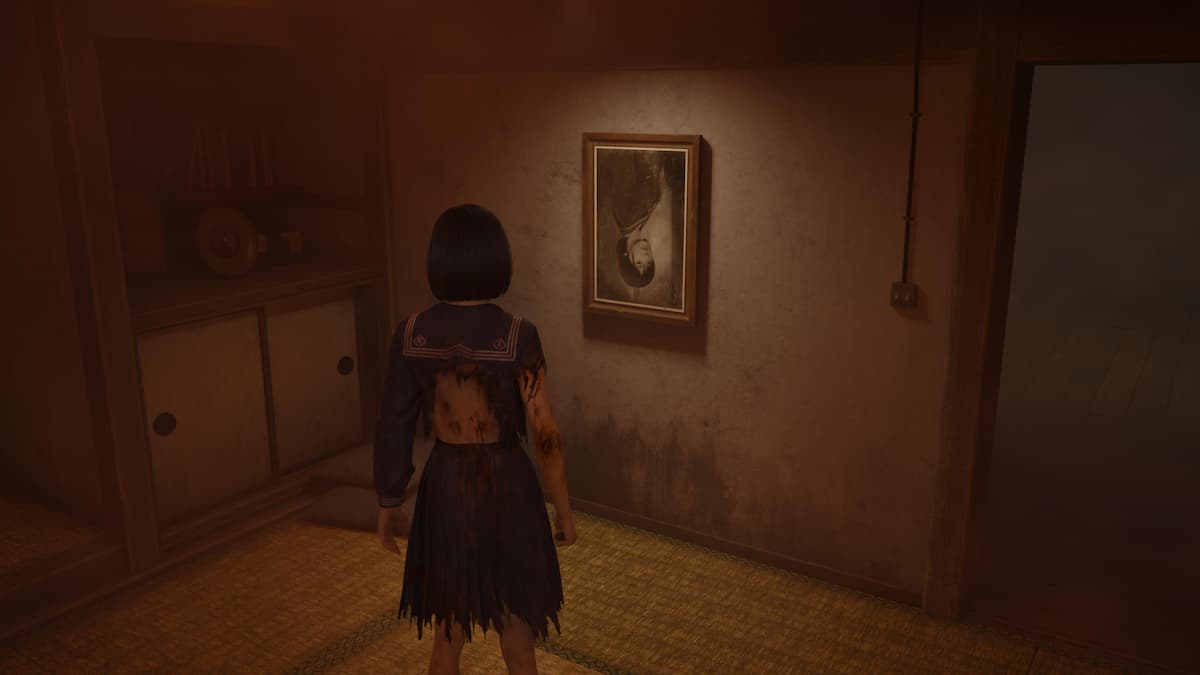
To complete this puzzle, you’ll first need to obtain the photo of Hinako herself in Shimizu Residence 2, then head back to Residence 1. Place the photo on the empty space on the wall, then interact with it to rotate it and make it upside-down.
Interact with the other three photos of Shu, Rinko, and Sakuko and make them face upright. This will complete the puzzle, allowing you to retrieve the crest from the group photo in the room.
If you’re going for Ending 2, the solution is as follows: Keep Hinako and her parents’ portraits upright, and upside-down for everyone else.
If you’re on new game plus and going for Ending 3, the solution is as follows: Keep Hinako, Shu, and Sakuko’s portraits upright, and upside-down for the parents and Rinko.
My Room Crest Puzzle

After obtaining all the crests, you’ll finally be able to attempt the puzzle in the hallway that leads into Hinako’s room. The clue is as follows: “The Sword and the Fox fought, battling upon a set of scales. The heavens themselves shuddered at the ferocity of their struggle. Day after day, the sun rose behind the Fox’s back and set behind the Sword’s; yet their fight knew no end. The scales upon which they fought, however, were no more, having been destroyed long ago.”
The line about the sun gives us a huge hint as to where the Fox and Sword crests should go. Since the sun rises in the east, the Fox crest should be on the right while the Sword crest goes to the left. The crest with the clouds goes up top, while the crest with the scales goes in the bottom slot. But wait, the clue also says the scales are no more. This means, that you need to flip the scales crest around, so the scales themselves are hidden.
If you’re going for Ending 2, the solution is as follows: Fox on top, black bird on the right, scales on the left, nothing on the bottom.
This will open up the door, allowing you to finally complete the Shimizu Residence puzzle segment in Silent Hill f.
Dark Shrine Mural Puzzle
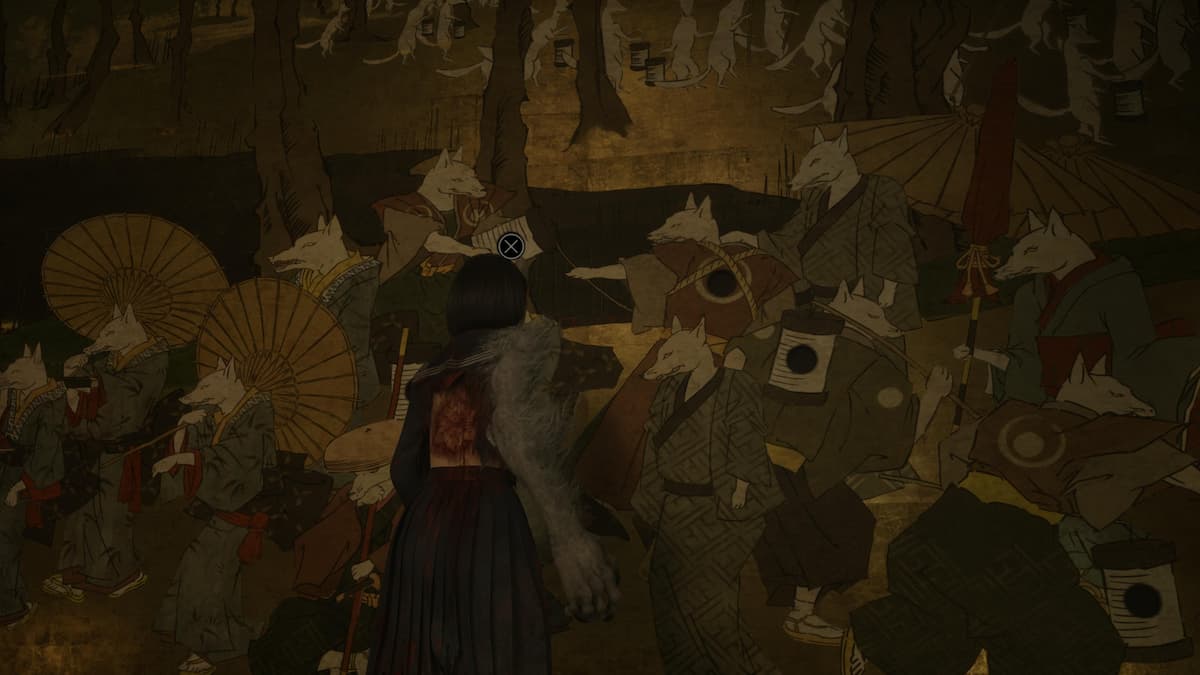
The final puzzle in Silent Hill f requires you to retrieve three crests: the Fox, the White Sparrow, and the Black Sparrow. From the room with the mural, you’ll find three doors on the sides. Simply go through them in order to retrieve the crests; it doesn’t matter which door you start with. The only thing to note is that if you go through the left door, for example, you might find yourself coming back to the mural room from the right door. Don’t let this confuse you; you still need to go through the right door again to access the next part and get the second crest.
Let’s start with the easy bit. Look to the very left of the mural and identify the fox next to the palanquin that’s facing away from everyone else on the right. Place the Fox crest here.
Next, go to the far right of the mural and look for two foxes facing each other. The fox on the left is trying to defend itself, while the fox on the right is trying to attack it. Place the White Sparrow crest on the left fox, and the Black Sparrow crest on the right fox.
If done correctly, the mural will reveal a door you can go through to progress.
Crimson Water Puzzle (New Game Plus)
en out for the wooden clack that sounds every few seconds. To solve this puzzle, you need to ring three bells in the right order in between each clack. So once you hear the first clack, immediately ring the first bell and head straight to the second bell. Ring it after the second clack, then head to the third bell and ring that after the third clack. You cannot skip the wooden clacks, or you’ll need to redo the puzzle
The Crimson Water puzzle solution is as follows:
- Volcano: Located near the temple entrance.
- Water: Located next to the puzzle rock.
- Tree: Located in the center on the stone path.
If done correctly, the pond will turn red and you’ll know that the puzzle is complete.
And that does it for our Silent Hill f puzzles guide.


